Monday 21 May 2012

Narrative Project - Final post

Having bisque fired all of my paper clay pieces I decided not to glaze them as they were already a raw, natural cream colour like the dandelion. With the seed heads, I threaded thin wire through the holes I had made in them, looped them at the top and then used the glue gun to glue them into place. Although I was left with blobs of glue I feel it added to the pieces as it looks like dew drops.


I glued 2 of these seeds to one of my paper clay dandelion pieces and the rest to the black background I have set up for my assessment.

Here are some photos of my work space ready for assessment in the morning! ---->>


Well I am wrecked, dunno why I leave blogging catch up on me... Adios Amigos! :)

Narrative Project - Dandelion light

I want to incorporate light into my narrative project based on the quote "shoot for the moon and if you miss you will still be among the stars" I want the dandelion head to represent the moon and the seeds blowing off from it representing shooting stars, wishes coming true. I experimented with candles and led lights. Here are some photos I have taken....

With candles (cant use these in college though)....


And with led lights (can use these in college :D)


Narrative Project - More paper clay

My papaer clay dandelion piece was bisque fired inside the bowl I made it in (just to be safe). When it came out of the kiln it got stuck to the bowl though :( I thought twas ruined! But with the tap of a hammer it came out and escaped with one little unnoticable breakage :) ------>>>


I made two more of these dandelion pieces from paper clay ( the exact same way as last time so I wont go into detail ) but left a hole at the top of them this time.


I wanted to make seeds that are blowing off of the dandelion head, which is why I left a hole. To make these seeds I folded them the exact same way as the "ribbons" I used to construct my pieces. I made a dozen of these seeds. I then got a thin wire and made a hole through the bottom of each seed so i could thread a wire through them once they were bisque fired :)


Glazing!

While my paperclay piece was being bisque fired, I got to glazing my "head" and my first clay pieces.

I wanted a matt glaze on my head so I used black copper manganese dioxide to bring out all the scratches, holes and dents in my piece to make it look more 3D! Of course I wore rubber gloves and a mask while doing this... I brushed the black copper manganese dioxide over the whole of my piece and sponged off the excess with water. I painted the black copper manganese dioxide into the eyes and onto the inside of the mouth to give it depth. Heres how it turned out....


I was thinking of painting on brown, green and yellow shade glazes onto my head the same way as Lucian Freud paints. Having painted a picture of his baby girl in the exact same style as Freud did, I wanted to apply this to my piece.

Freuds painting of his daughter.
(I will upload my version later!)


Buuuut, one day I walks into the library and BOOOM my piece was inside the cabinet.. was not expecting that :P sooo I decided to leave it the way it was, it looks like a charcoal drawing on a sheet of paper.


Back to my first narrative project dandelion pieces.... I wanted them to be natural and wanted them glazed a glossy cream colour. The pieces were already cream from the bisque firing so I dipped them into a transparency glaze. Here is how they turned out after they were fired.....>>


Narrative Project - Paper Clay

Working with paperclay took a little more time than the normal clay and was very delicate, like paper! I had to make these sheets of clay by spreading the paper clay slip over a plaster block with a soft rubber kidney, it was like icing a cake! Once I made sure I had spread it out evenly I left it to dry for 10 to 12 mins before pulling up around two sides of the sheet with a metal kidney tool. I then peeled the sheet of clay off the plaster carefully making sure it didnt tear and kept the sheet covered in plastic to prevent it from drying further. I made 7 of these sheets.

Once the sheets were made I got to work! I cut off the uneven edges using a ruler and a potters knife and then cut the clay into strips of about 1cm/1.5cm wide.


Now here is what my "ribbons" look like! I just folded the strip of paper clay and pressed the clay together with a little paper clay slip where ever it joined. (no need to score it this time)


Like the last time, I built these "ribbons" up inside the bowl and pressed them into shape. I also joined each piece in the bowl with a little paper clay slip.


After an hour or so I ended up with this full bowl which looks like spaghetti or a honeycomb! Again I left it to harden a bit over night before I removed it from the bowl.


And heeere it is! I am very happy with this piece although it is quite delicate!

Narrative Project - Constructing my clay piece

Okay I didnt document this one very well and im sorta bad at explaining my work oops :/  To start, I rolled out a sheet of clay on the slab roller. I didnt think it was thin enough for what I wanted to do with it so I rolled it out more using a rolling pin making sure it was even.
I cut off the uneven edges with a potters knife and ruler and then cut the clay into strips of about 2cm wide.
Putting each strip of clay inbetween a piece of cloth, I rubbed my fingers along each side to create a thinner, neater line.
I folded the clay just like a ribbon - over and back, and scored and joined every part where the clay met with slip.
I began to build these ribbon like structures up inside the bowl, pressing them into the shape of the bowl and again joining each part by scoring and pinching together with slip.


I kept building it up and up until I had filled the bowl. I left it over night before I removed it from the bowl.

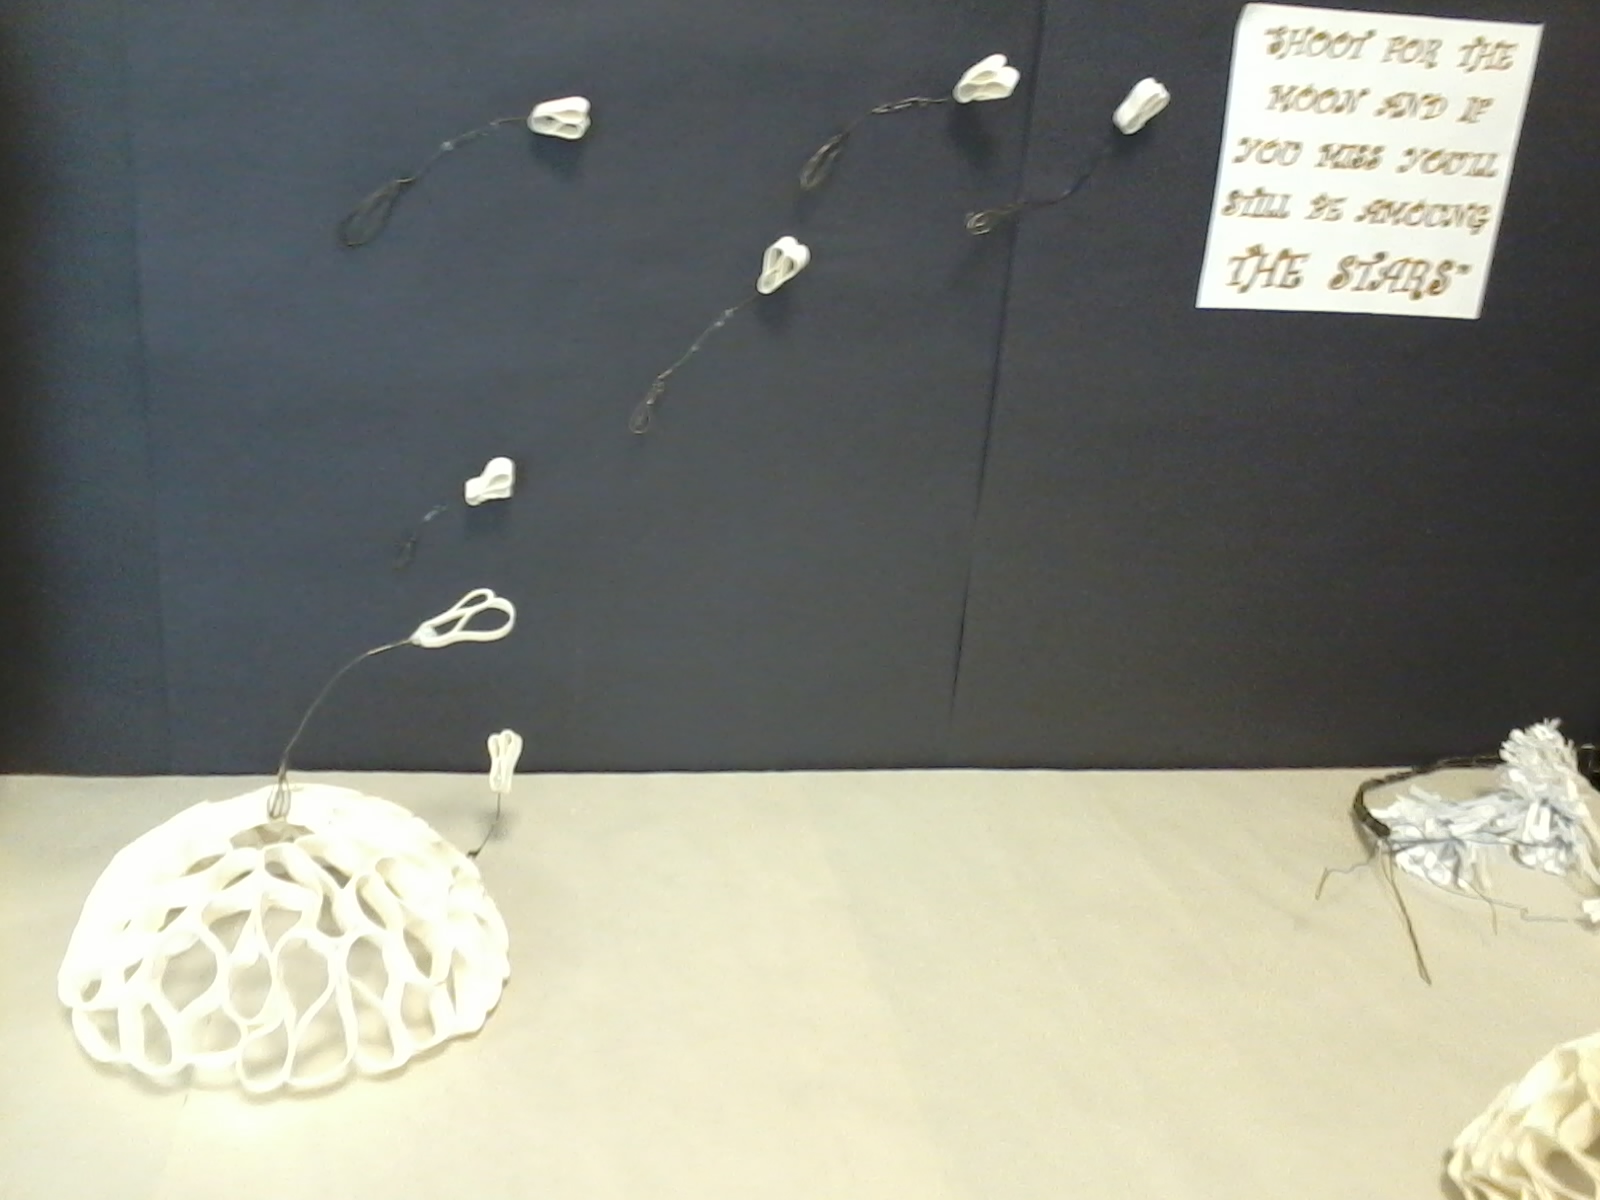
Heres how it turned out :)


I also made a half of one in the exact same way with the hope that I could join them together into a ball shape like a dandelion which has had some of its seeds blown away but it didnt match up :(  I put both pieces down to the kiln to be bisque fired.


Sunday 20 May 2012

Narrative project - ideas!

It was as simple as this.. I was lying in bed thinking about my narrative project when I noticed a lace design on one of my tops looked sort of like a dandelion so I drew it out..

From this design I started drawing up my own ideas.


I want to use clay or porcelain rolled out very thinly and folded sort of like a ribbon into a semi circular bowl shape. I also want to make the seeds in the same way and have them coming out from the clay/porcelain piece.

Narrative Project


We were given a narrative project in which we had to base a ceramic piece on a quote, poem, saying, story etc. I started by doing some simple brainstorming as I had no idea where to go!


After this I decided to focus on films and narrowed it down to one of my favourite films PS I Love You. I watched the film and took down quotes which I liked and found interesting.


"Shoot for the moon and if you miss you will still be among the stars", was what I decided to go with. We were given a list of words that we could match our quotes or whatever up with so it might be easier to work on. I thought my quote was like a "wish" so I went with that. I started drawing up pictures of things to do with wishes, wishing wells, stars etc. It wasnt until I painted a picture of someone blowing a dandelion that I noticed the dandelion seeds look like shooting stars.


So taking this connection I went back to my original quote "Shoot for the moon and if you miss you will still be amoung the stars" and began brainstorming ideas :)